In the past – launching an international MVNO required complex negotiations with multiple operators, investment in a subscription management platform, and managing multiple marketplace listings. Not any longer! With Spenza, you will be launching your MVNO in minutes!
Spenza provides a robust MVNO enablement platform, enabling brands to procure, resell plans, collect payments, and track subscriptions seamlessly. It also offers enterprise mobility management solutions that streamline telecom operations. This guide explains how to link a Spenza account with a Shopify store, add custom products, and resell mobile plans globally.
Benefits of Using Spenza for MVNO Launches
Launching an international MVNO has traditionally been a complex and costly process, but with Spenza’s MVNO enablement platform, you can experience numerous benefits that simplify and accelerate your journey.
- Faster Time-to-Market: Spenza has the added advantage of integrating with other platforms such as Shopify to help you establish your MVNO in minutes not weeks. The easy setup and synchronization makes for a very short go-live time so that your telecom plans are ready for customers almost as soon as possible.
- Cost Efficiency: Spenza saves money by not requiring expensive investments in a subscription management platform and many operators’ negotiations. This eliminates operational costs that normally come hand in hand with the formation of an MVNO and frees up capital which might be of immense importance in other areas of business.
- Simplified Enterprise Mobility Management: The Spenza helps organisations to tackle the EMM challenges effectively since it helps brands to control telecom subscriptions, monitor usage and do collections for them at the same place. This integration helps you in getting visibility and control over your MVNO operations and therefore makes your business management comfortable.
- Scalable and Global Reach: Whether you are looking to sell mobile plans locally or globally, Spenza allows for global reselling capabilities. You can easily add custom products, adjust offerings, and scale your MVNO operations without geographical limitations.
- Real-Time Tracking and Updates: With Spenza’s enterprise mobility management solutions, you gain access to real-time updates and a centralized dashboard that lets you track and manage phone lines, subscriptions, and usage. This real-time data empowers you to make informed decisions and optimize your telecom services with ease.
By choosing Spenza for your MVNO launch, you are not just simplifying the process but also empowering your brand with the tools needed for sustainable and efficient telecom operations.
Linking Spenza Account with Shopify Store
Step 1: Log in to your Spenza business account. Go to Settings → Account Management.
Inside Account Management, locate “Shopify Merchant.” This is where you can link your Shopify store with your Spenza account. Click on “Connect” and add the link to your Shopify store
.Connecting Shopify with Spenza is beneficial as it ensures seamless synchronization of purchase details, eliminating the need for manual data entry. This integration enhances enterprise mobility management by allowing real-time updates, better inventory management, and streamlined operations.

Install Spenza from Shopify Store
Step 2: Open your Shopify admin dashboard and navigate to the Shopify App Store. Use the search bar to find the Spenza app. Once located, click on it to view the app details. Click on the “Install” button and follow the on-screen instructions to add the Spenza app to your Shopify store.
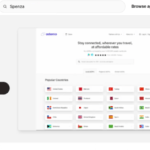
Step 3: After installation, go to the Apps section in your Shopify admin dashboard. You will see Spenza listed among your installed apps.
Click on the Spenza app to open it. You will be prompted to log in to your Spenza business account. Enter your credentials and log in. Once logged in, you will have access to the Spenza Marketplace. Here, you can view all available plans. Select the plans you wish to add to your Shopify store and click on “Proceed” to add them to your product cart.
Organizing Products and Collections

Step 4: Go to the Products page from your Shopify admin dashboard. Here, you can see all the products available in your store. Select the products (plans) you added from Spenza and add them to your preferred collections. This makes it easier for customers to find and purchase them. After organizing the products into collections, ensure to save the changes to update your store catalog.
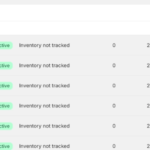
Step 5: Add these products to your sales channel as well, in this case, the online store. This step ensures that the products are visible to your customers for purchase.

Purchasing and Tracking Subscriptions
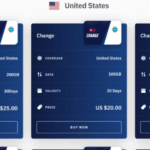
Step 6: The products you added from Spenza will now be visible in your Shopify store. Customers can browse these products, view details, and select the plans they wish to purchase. During the purchase process, customers will need to enter their contact information and payment details. This ensures that all necessary information is collected for the subscription.
Step 7: After the payment is successfully processed, the customer will receive an order confirmation. This typically includes a confirmation email with details of the purchase. The subscription will be activated, and the user’s details will be recorded in your Spenza account.
Managing Subscriptions with Enterprise Mobility

Step 8: In your Spenza account, go to the Enterprise Mobility Management section and select Phone Lines. Here, you will see the updated phone line information, including the new subscriptions. The user information will also be updated in your Spenza database, allowing you to track phone lines, subscriptions, and usage.

Step 9: In the Enterprise Mobility Management Solutions section, select Subscriptions. A new subscription entry will be created for each purchase. By clicking on the subscription ID, you can view detailed information about the subscription, including purchase details and usage data.


Step 10: The Spenza dashboard provides a centralized view of all your subscriptions. You can see spend and usage data for subscriptions from various operators. The dashboard offers near real-time updates, allowing you to monitor and manage your telecom expenses efficiently.

You can seamlessly integrate Spenza with Shopify, allowing for efficient management and tracking of telecom plans and subscriptions. These enterprise mobility management solutions make it easier to manage your business operations globally.
See Spenza demo for step-by-step instructions on launching an MVNO.
Spenza’s MVNO enablement platform simplifies launching an international MVNO by integrating with platforms like Shopify. It allows brands to procure, resell telecom plans, collect payments, and track subscriptions seamlessly. This solution eliminates the need for complex negotiations, subscription management platforms, and multiple marketplace listings. With Spenza, businesses can go live quickly, scale globally, and manage telecom operations with ease, making it the ideal platform for modern MVNO launches.
Spenza provides cost-efficient solutions by eliminating the need for heavy investments in subscription management platforms and reducing the operational complexity of dealing with multiple telecom operators. By using Spenza, businesses can focus on reselling telecom plans and managing subscriptions without worrying about complex setups. Its centralized dashboard and enterprise mobility management features allow operators to track spending and usage, further optimizing resources and minimizing unnecessary expenditures. This approach enables businesses to scale their MVNOs without incurring prohibitive costs.
Enterprise Mobility Management (EMM) refers to the administration of mobile devices, applications, and data within a company. Spenza integrates EMM solutions by providing a platform where businesses can easily track phone lines, subscriptions, and usage data in real-time. Through Spenza’s dashboard, businesses can gain valuable insights into telecom expenses and user activities, all while maintaining control over their MVNO operations. This seamless integration ensures greater operational efficiency, better inventory management, and real-time updates, allowing businesses to manage their telecom services effectively.
Yes, Spenza supports global MVNO launches by offering reselling capabilities that allow businesses to provide mobile plans worldwide. The platform’s scalability ensures that companies can easily adjust their offerings based on geographic location and customer demand. By connecting Spenza with Shopify, businesses can list telecom products in multiple currencies and regions, reaching a global audience. Spenza’s integration with enterprise mobility management solutions ensures that businesses can monitor subscriptions and phone lines across borders, making it an ideal platform for global MVNO operations.
The integration between Spenza and Shopify enhances the management of telecom products by synchronizing purchase details, tracking inventory, and enabling real-time updates. This integration helps eliminate manual data entry, providing a smoother user experience and improving operational efficiency. MVNO operators can easily list and sell mobile plans, organize products into collections, and make them available through Shopify’s online store. By connecting Spenza with Shopify, businesses can focus on growing their customer base, managing subscriptions, and enhancing their enterprise mobility management efforts seamlessly.


