Managing large volumes of data efficiently is crucial for businesses, especially in the telecom inventory management sector. With numerous phone lines, users, devices, collections, and subscriptions to manage, staying organized can become overwhelming. Spenza’s bulk import feature offers a streamlined solution to help you quickly and accurately upload data, reducing the need for manual entry and minimizing errors. This powerful tool simplifies inventory management solutions, enabling businesses to handle vast amounts of telecom data seamlessly. In this guide, we will walk you through how to use this feature, ensuring a smooth and efficient inventory management process for your business.
This guide explains how to use the bulk import feature on Spenza to manage inventories. This feature streamlines the process of managing large volumes of data, making it easier and more efficient to keep track of all your resources. Spenza offers robust inventory management solutions by keeping a record of phone lines, users, devices, collections, and subscriptions related to your business.
To upload this data, follow these steps:
Step 1: Navigate to the respective page for the data you want to upload. This ensures you are in the correct section to manage your specific type of data.
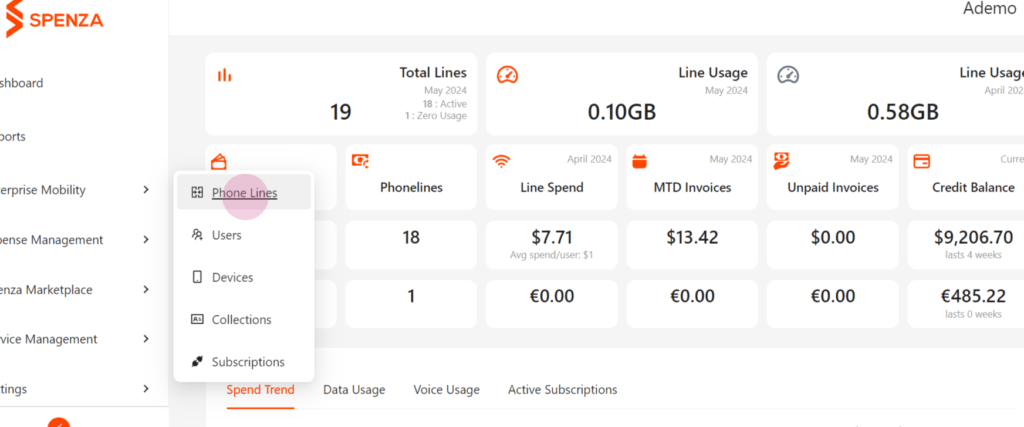
Step 2: Use the Import option to add a CSV file for bulk import. This method allows you to quickly and accurately upload large datasets without manual entry, saving time and reducing errors. Spenza’s bulk import feature is especially beneficial for businesses focusing on telecom inventory management, where handling data for phone lines and devices is crucial.
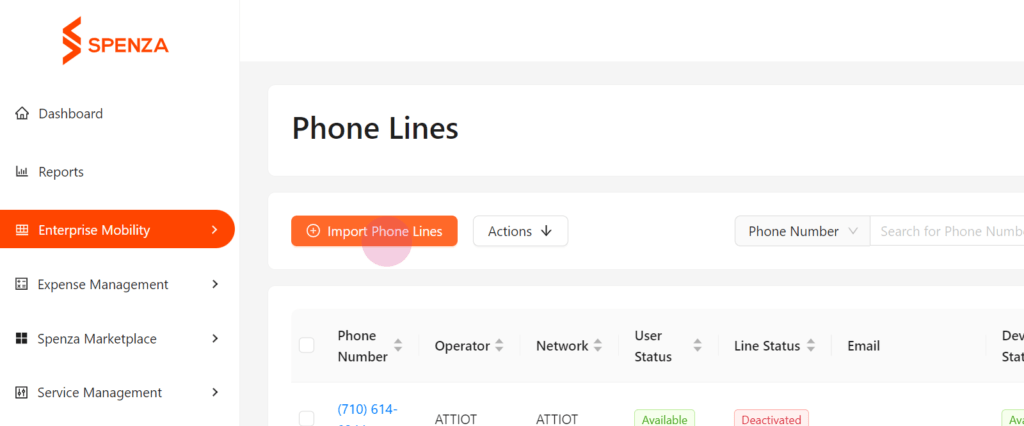
Step 3: For phone lines, you may need to select the appropriate mode.
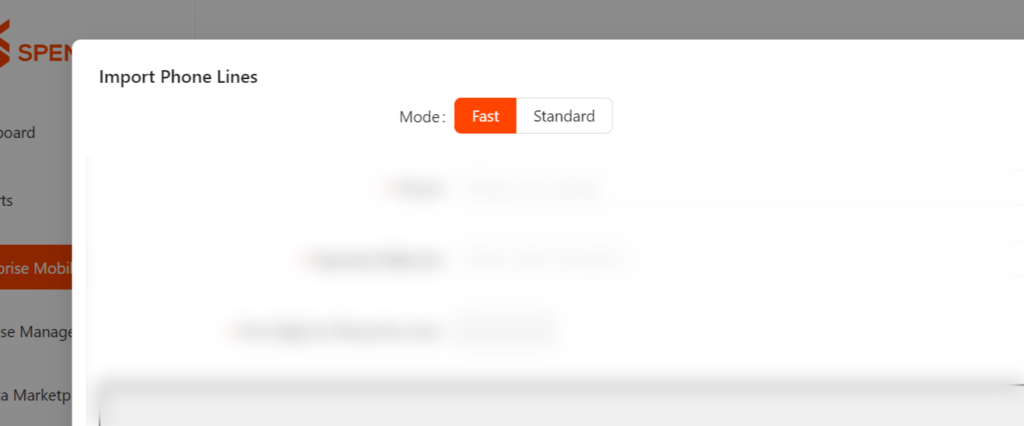
If you have a list of ICCIDs for phone lines, and optionally, the activation code, and if they all belong to the same operator network, choose the Fast mode.
Select Standard Mode if the phone lines contain all details such as phone number, device, source, and more. This mode is ideal for comprehensive data uploads where all necessary information is included in the CSV file.
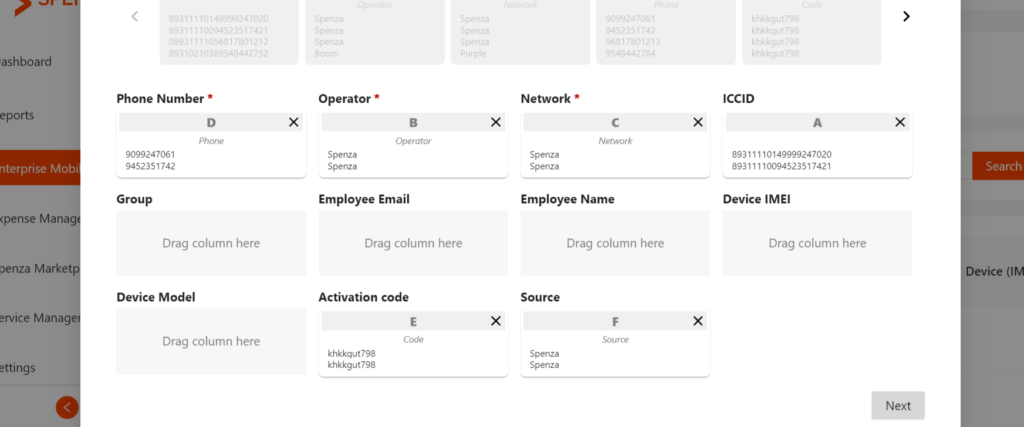
Step 4: Drag and drop to match the CSV columns with the provided fields. This step ensures that all data is correctly mapped, preventing any misalignment or data loss during the import process.
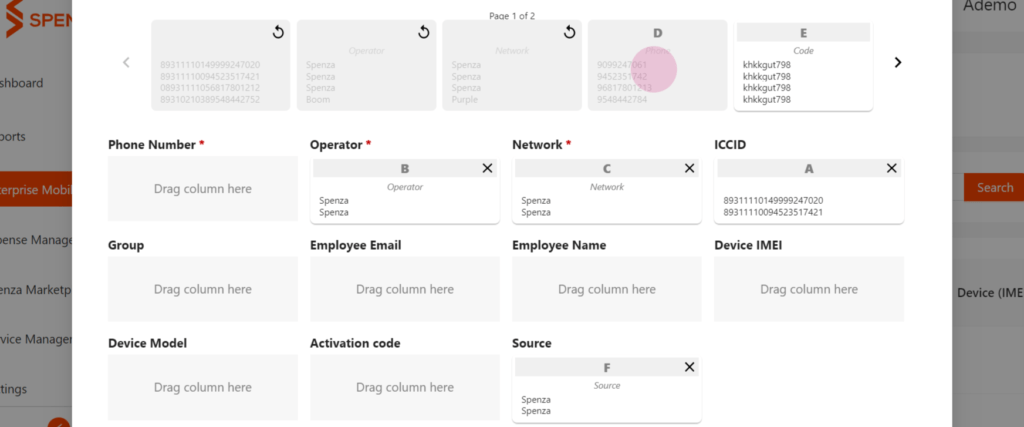
Phone lines, users, devices, and subscriptions can be uploaded in a similar manner on their respective pages.
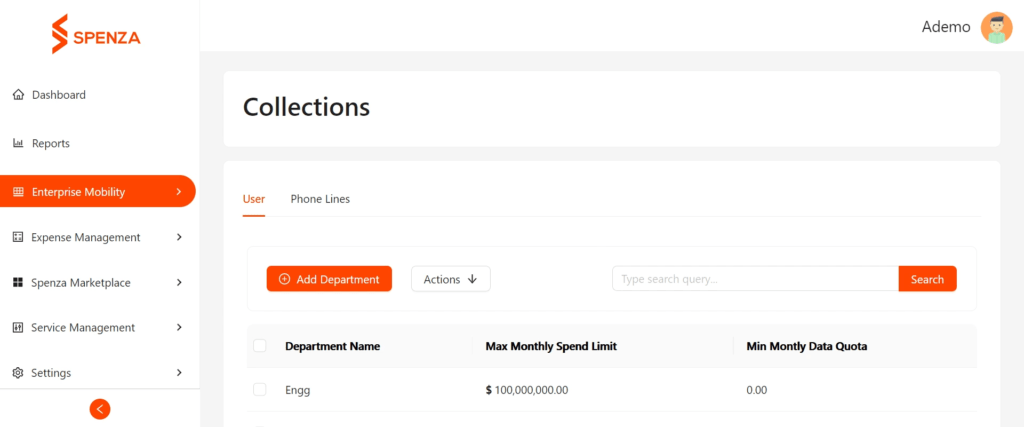
Users and phone lines will automatically group under the department name you provided during the entry, along with the specified spend and data limit, within the Collections section. This organizational feature is part of Spenza inventory management solutions, helping businesses maintain clarity and structure in their telecom inventory management.
Step 5: Once perfectly matched, click on Next, followed by Finish to finalize your upload. This confirms that all data has been correctly mapped and is ready to be imported into the system.
To monitor the status of each file upload, follow these steps:
Step 6: Navigate to the File Store in the Expense Management section. This section provides a centralized location to track all your uploaded files.
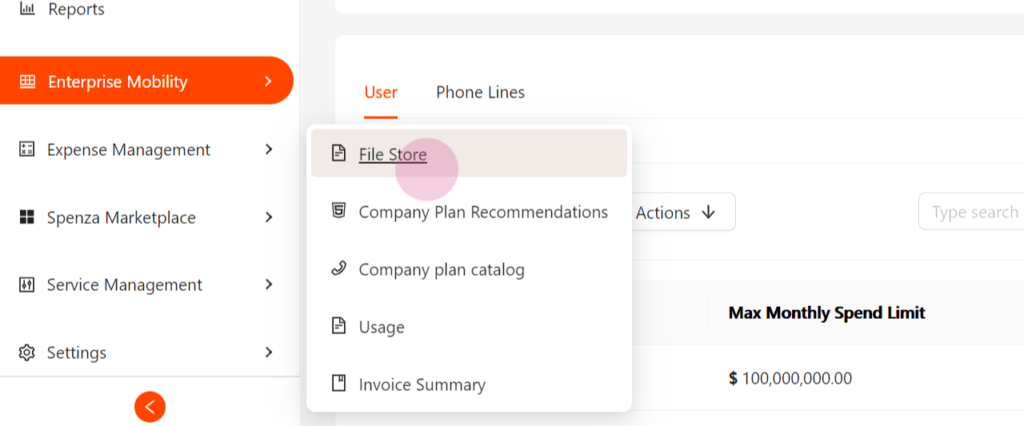
Step 7: Here, find all the files with the upload status for each file. Download this file for further information using the Actions button. This allows you to keep a record of your uploads and ensure that all data has been processed correctly.
This is how to manage everything in one place with Spenza and receive notifications by email when any changes are made. This streamlined process not only saves time but also ensures accuracy and efficiency in managing your inventories and subscriptions. By following these steps, you can maximize the benefits of Spenza bulk import feature and leverage its inventory management solutions to keep your business operations smooth and organized.
Spenza’s bulk import feature streamlines telecom inventory management by enabling businesses to upload large datasets, such as phone lines, users, devices, collections, and subscriptions, using CSV files. This tool minimizes manual entry, reduces errors, and enhances efficiency in handling vast amounts of data. As part of Spenza’s robust inventory management solutions, this feature ensures smooth and accurate data uploads, making it an indispensable tool for businesses managing complex telecom inventory systems.
The bulk import feature simplifies telecom inventory management by allowing you to upload phone lines and devices quickly. Navigate to the specific section, select the Import option, and add your CSV file. Choose Fast Mode for ICCIDs belonging to the same network or Standard Mode for comprehensive uploads. This process, part of Spenza’s inventory management solutions, ensures accurate data mapping, saving time and maintaining the integrity of your telecom inventory.
To maintain accuracy in telecom inventory management, Spenza’s bulk import feature lets you drag and drop CSV columns to match them with required fields. Proper mapping ensures that phone lines, users, devices, and subscriptions are aligned correctly. This step, integral to Spenza’s inventory management solutions, minimizes errors, streamlines the upload process, and keeps your telecom inventory data structured, helping businesses achieve efficiency and organization in handling complex inventories.
The File Store in Spenza’s Expense Management section centralizes the tracking of uploaded files, a vital feature for telecom inventory management. Here, you can check the upload status, download files, and ensure data accuracy. This functionality, part of Spenza’s inventory management solutions, helps businesses monitor large datasets efficiently. By maintaining a clear record of uploads, Spenza ensures that inventory data management is seamless and error-free, supporting organized business operations.
Spenza’s bulk import feature enhances telecom inventory management by automatically grouping phone lines and users under specified department names during data uploads. These groups include details such as spend and data limits, ensuring structured inventory organization. As part of Spenza’s comprehensive inventory management solutions, this functionality saves time, reduces manual effort, and keeps telecom inventories clear and accessible, enabling businesses to manage resources effectively and maintain operational efficiency.

